How to install Windows 11 – Complete guide without TPM with official ISO
The time has finally come to install Windows 11, and with it new features and a good facelift to renew our experience with the windows system. The main concern during the wait since the first Insider Preview came out has been meeting the installation requirements on our PC, the famous TPM 2.0. Well, it will no longer be an obstacle, because thanks to BIOS updates from all manufacturers we will be able to install Windows 11 with official ISO and without TPM. Shall we start?
Index of contents
Requirements to Install Windows 11
We will leave the review of new features of the system for once we have it installed, so the most important thing before getting down to business is to know the technical requirements that we must meet.
These will be the minimum requirements to install Windows 11, although there are a series of compatible functions that, depending on the characteristics of our equipment, we can take advantage of:
Install Windows 11 without TPM 2.0 just by updating your BIOS
In the list of requirements we see that the obligation to have a TPM 2.0 module installed on our equipment is maintained, being the main novelty, and also a concern on the part of the users. And it is that this module is usually included only in laptops, and not 100% of them.
In the case of desktops, most motherboards have a header or interface to install this module, but it will not be included with it in almost any case. The viable and legal option until now was to buy and install a TPM module, causing an outlay of extra money on modules that are usually between 15 and 40 euros.
A second option was to wait for modified unofficial ISOs to bypass this limitation, or to use third-party tools such as WhyNotWin11 or the like that “trick” Windows 11 into allowing installation via update. In turn, failure to meet this requirement also results in being blocked from getting updates if the “cheating” tool doesn't work well.
But there is a third option, more interesting, safer and valid for almost anyone, which will be to take advantage of the ability to update our BIOS. Since day 1 of launch, motherboard manufacturers have gone to work with an update in the BIOS of their motherboards that automatically enables the TPM or fTPM in the case of AMD even without the physical module. That does not mean that we must not necessarily have a UEFI BIOS with support for secure boot, something that almost all current computers do.
In this way we can carry out the installation with the official Microsoft ISO, the safest and without third-party modifications that compromise our security. Be very careful with this type of ISO, because we don't know where it comes from or who has touched it, just like the applications that modify the registry.
Update our BIOS to support Windows 11
So with the above information, both laptop users that already have TPM and desktop PC users with updated BIOS will be able to enjoy W11. The only inconvenience will be knowing how to update our BIOS, a process that is currently very simple to carry out.
All manufacturers without exception have a support section on their website where they give access to updates and tools for their base plates and laptops. We have visited the most common brands such as Asus, ASRock, Gigabyte or MSI, and indeed, each of their motherboards already has an update available to support Windows 11.
It will be as simple as:
- Know the name of our motherboard, for example, using CPU-Z and looking at the Motherboard section, and search for it on the brand's official website.
- We will download the most current BIOS file available in the list, which will refer to TPM or Windows 11 in its description.
- We must save the file as indicated by the manufacturer on a USB drive (normally the manufacturer will indicate the name that we must assign to it)
- We start the computer by accessing the BIOS, and run its update tool
How to install Windows 11 step by step
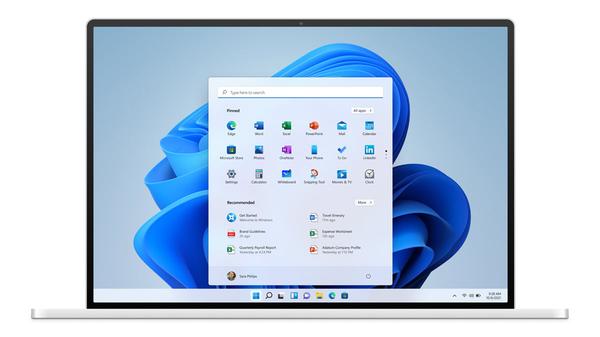
The time has finally come to start the Windows 11 installation process, which from here on will be exactly the same as for Windows 10 and previous versions. If you have already done it once, it will be a simple task, if not, then here we go.
To download the Installation Wizard, the Installation Media Tool or the Windows ISO we will go to the official page from this link.
Way 1: Windows Update
If you're looking at this tutorial some time after the release date in October 2021, you may already have the ability to update your computer in Windows Update.
The process will not be different from any other feature update, by going to the Settings panel > Windows Update and proceeding to download and install Windows 11. In this section we will already find an indication of whether or not our PC is compatible with Windows 11, such and as we see in the previous image. It would just be a matter of waiting.
Way 2: Installation Wizard
The second option if we don't want to complicate our lives and want to have Windows 11 immediately, will be to use the installation wizard. It is a tool just like the one for Windows 10, which is installed on the computer and through a wizard it will download and update the system manually.
We recommend that you take a look at where you can download official Windows 11 ISOs.
Way 3: Manual installation
This will be the one that we carry out, a completely clean installation of the system formatting the hard drive or partition so that there is no trace of Windows 10. We have the recommended option that will be to install the media creation tool, which downloads the ISO and creates a bootable USB. A second option would be to download the ISO and with an external tool like Rufus create the installation USB ourselves.
The process will begin by installing the tool on our current system, starting the wizard that will guide us through the creation of the installation medium.
We must choose the USB flash drive option if we want to make the USB bootable, obviously with said drive connected to the PC.
Start the bootable USB on the computer
The next step, once the installation medium has been created, will be to get the USB to boot before our hard drive to start with the installation wizard. Since at this point we all must have a PC with UEFI BIOS as an essential requirement to install Windows 11, the procedure is reduced in difficulty.
In most cases, the BIOS has a boot menu where, manually, we can select the drive with which we want the PC to start. With the Asus BIOS, for example, it will appear by pressing F8, in MSI it will be with F11, and so on with each manufacturer.
In case we do not find the right key, we will directly access the BIOS by pressing F2 or DEL in most BIOS, or F11 for some laptops. Inside, we will modify the boot menu to place the USB in the first position, pressing F10 to store the changes and restart.
If we don't know how to access the BIOS directly either, we can do it from Windows 10. We open start and display the shutdown menu, and holding down the Shift key we choose Restart. In the blue menu that appears we choose Troubleshoot > Advanced Options > UEFI Firmware Settings > Restart.
Installation wizard same as always
With the previous procedure we will have finally managed to access the Windows 11 installation menu, which will be exactly the same as that of W11. They could have changed at least the background color by now, but not even that.
Selecting the relevant language and keyboard options, we will click on Next to access the following screen, where we choose Install now. The time has come!
In the next step, it will ask us for the license key, which we will leave empty whether or not we have the key, and we will choose I do not have a product key. We do not have to worry about this, because Windows will automatically take the key, in case it is an OEM PC with a key inserted in the BIOS, or a key based on a user account when we register with our Microsoft account.
We recommend reading our review on Windows 11
Next, we must choose the distribution that we want to install (the one that we have associated with our license, if we have one). This will be the moment in which Windows will analyze the PC to ensure that the requirements are met.
If we get a notice that the computer can't run Windows 11, we should double check the TPM issue and our BIOS, or check with the vendor. We have already seen that an installation was not possible from VirtualBox, so we continue with our desktop PC, with the BIOS updated to support the TPM even though it is not available.
We choose a custom installation for us to manage the hard drive from the wizard that will appear below. Using the mouse drivers we can delete all the partitions and install a clean copy on the unit. In our case, we do not have data or OEM partitions as it is our own SSD, but each one must only delete the relevant partitions or identify the one that has the Windows installation to make the new installation on it.
As always, the system will automatically create several hidden extra partitions such as reserved or recovery to proceed with the installation. The next step will be to configure Windows 11 with the startup wizard.
Windows 11 initial setup
If the installation was successful, the PC will reboot twice and the setup wizard will appear immediately. We will be able to verify that the fonts and the presentation style is much more beautiful than before, adapting to the new times.
To be concise, the steps of the wizard will be practically the same as in Windows 10, but this time it forces us to connect to a network to log in with a Microsoft account. In Windows 10 we were given the possibility to create a local account at least, so it can be an inconvenience for many. By implementing its integration with TPM, we can also log in with a security key.
There is another additional step after registration, which will be to configure the equipment according to the use that we are going to give it. It will be optional, of course, but it doesn't hurt to do it to complete the installation. Depending on what we choose, we will be presented with different options below, in our case we are presented with the option to log in to Xbox.
There is not much more to do, since the process of installing Windows 11 will have concluded. The next steps would be to install the relevant drivers, with special emphasis on the GPU and board drivers to take advantage of DirectStorage.
What's new in Windows 11
Once Windows 11 is installed, it is worth taking a look at the most relevant news that it brings us, at least visually and in terms of usability for users. The most relevant will undoubtedly be in the design of the interface itself with:
These are the changes at the presentation level in the interface, but there are also others that will help us improve the user experience of the system:
These are some of the most important improvements at the interface level, although the essence of the file explorer with the same distribution will be maintained, and Apps such as Paint, WordPad or the task manager remain the same.
Is it worth the change?
With all this, we believe that installing Windows 11 on those computers that are compatible and can update their BIOS to remove the TPM 2.0 restriction will be a correct decision. There are many changes that Microsoft has introduced, these and others that are not visible to the naked eye. Above all, designed to improve the user experience and increase the security of the system to prevent attacks and shield our user account.
It is a very agile system, at least newly installed with low load of applications and without many updates on the original installation. It is tremendously fast in its startup, as well as in the loading of applications and games thanks to that specific function to take better advantage of high-performance SSDs with the corresponding drivers from AMD or Intel.
The adaptation is almost instantaneous, because with a new and beautiful design everything is easier and more satisfying. For now, we are really liking Windows 11, and it takes advantage of everything that Windows 10 has been adding update after update. With time and the hours of use, we will see if there are any flaws or details, for now let's enjoy the new toy. Many more Windows 11 tutorials will be coming soon to get the most out of this system and get to know it in depth, so stay tuned.
We would appreciate it if you could leave your doubts about the installation or the system in the comments to include them in these tutorials.

