Install the same printer in Windows 10 with different settings: this is how you can do it
A window will open with very wide options. We must go to the tab called Ports. This window details the port that the printer is using. Without leaving the properties of the printer, we then click on the Advanced Options tab to find out the driver that is being used, and thus be able to know which one to select when adding the printer. We can close the window by clicking Cancel directly. If we have made any changes, for it to be applied we select Accept.
Well, now we know all the information needed to install the printer a second time. We therefore return to the Devices and Printers window of the control panel. In the top bar, an option called Add a printer will appear. Click on it and an installation wizard will open. At the bottom of this wizard we will see the phrase "the printer I want is not in the list". We click here to install our printer manually.
Add a new printer
A new window will then appear with several options. We mark the last one, add a local or network printer with manual configuration. Click on next and, of the two options, we opted for using an existing port. We activate the dropdown and select the port that we saw previously in the ports tab of the printer properties. If you don't remember, check back. We click next and now we have to choose the controller. We must also remember the driver used by our printer, whose information was in the advanced options tab of the printer properties. When we have chosen it, click on next again.
In this window we confirm that we want to use the same driver that is currently installed. This is the recommended option. We click on next again.
Now we need to give the printer a name. We can give it the one we want, but it is recommended to choose one that allows you to remember both the physical printer and the configuration that you are going to apply to it. However, you can change the name of the printer later. Finally choose if you want to configure printer sharing or not, and click next.
If you want, once you get here, you are offered the option to print a test page to try out the printer settings. Finally, click on the Finish tab. Our new printer is now configured for use.
Manage your printers
Although it does not always happen, it is possible that our new device appears in the Devices and Printers window. To start using it, we can already assign a different configuration to the original and thus speed up our impressions. With the right button on it, click on Printing Preferences. We assign the options that we consider appropriate and Windows will save these settings separately.
If, for example, the configuration of your main printer prints documents in color, you can assign the option to do it in black and white to your second one. You can also apply low resolution options to it if you just want to print proof drafts. In this way, we will have saved ourselves the step of touching the configuration every time we print a new document.
Also, by right-clicking on Printer Properties, we can change the name, as noted above. You can repeat this entire process multiple times, applying as many settings as you like. Just keep in mind that you should choose different names to help you remember the settings for each profile.
However, in some cases, duplicate printer settings do not appear in the Devices and Printers window. Nor do they do it in the Settings–Devices–printers and scanners option. Windows 10 makes a determination to combine the various settings into a single option. However, you can access the new settings from the Devices and Printers window, and by right-clicking on the original printer. The preferences and properties of each secondary printer will then be displayed.
In the settings menu of the Windows start icon, printers can be managed in some cases (although they do not always appear). It will be in the Devices option. Then in printers and scanners. We click on our printer and select manage. Here we can move between the different profiles and adjust the settings.
There is another way to manage, not only the duplicate printers, but also all the devices connected to the computer. To do this, we must press the Windows key + R. The Run dialog box will open. We can also access it by clicking the right mouse button on the Windows start icon, which is in the lower left corner of our screen. Now, we paste the following command in the bar: shell:::{26EE0668-A00A-44D7-9371-BEB064C98683}�::{2227A280-3AEA-1069-A2DE-08002B30309D}.
We give it to accept and a printer administration window will open, where all the devices installed separately are located. Here we can also set preferences, different printing options, change the name or delete some extra configuration if we wish.
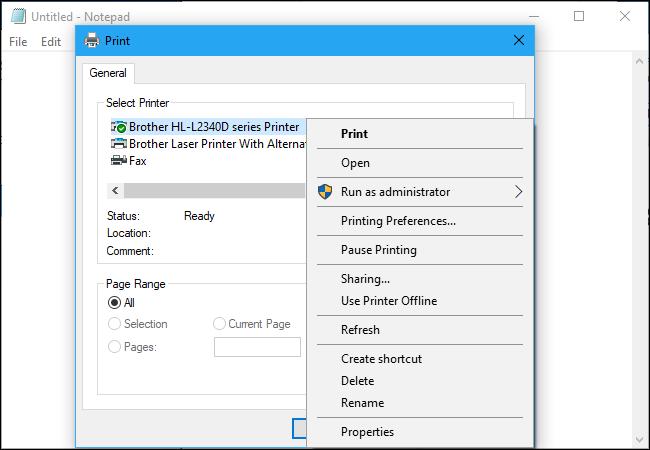
The extra settings will also appear, obviously, in the dialog box that is displayed when you go to print a document. Here you can select and modify both the original and secondary printers.

