What is WPS on a WiFi network and why is it recommended to disable it?
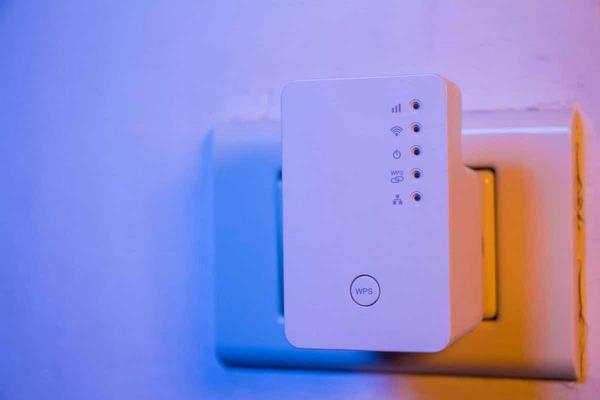
Many of us have seen at some point that on the box of a new router or on the modem that provides us with the internet, there is a label, logo or a button that says "Wi-Fi Protected Setup", "WPS", "QSS" or even two arrows pointing to each other in some of its parts.
Wi-Fi Protected Setup —or WPS— was introduced as a standard in 2007 by the Wi-Fi Alliance. It is a function in which if we press a button or enter a PIN, we automatically obtain the password to connect to a WiFi network with encryption such as WPA and WPA2.
Although it was born as a way to facilitate the connection between devices and access points or routers, the reality is that the planning was not entirely adequate. And while WPS serves its purpose, the downside comes when it's more of an exploitable security issue, in a feature that people rarely use.
But before we get to that point, let's break this feature down from the beginning:
How does WPS work?
WPS is designed based on 3 elements:
enroll or customer
The enrollee, client or registered is that device that will request access to the wireless network. It can be understood as that device that we want to connect to the WiFi through the button, PIN, NFC tag or USB memory with the key.
to register
The registrar will be that device/server on the network that will be in charge of generating or revoking the access credentials (network name and password). Despite not necessarily being the router, it is common in most cases, especially in home environments or SMEs.
authenticator
On the other hand, the authenticator will be the access point to which the client or enrollee wishes to connect. And under prior verification of the registrar, it will allow the connection between the client and the network. It can be understood as an intermediate device that will be the one that allows (or not) the connection to the network, depending on what the other party tells it what to do.
Now, the registrar and authenticator are commonly integrated as one in a compatible router, so the connection can be simplified as something between router and device.
How is WPS activated?
PBC, or Push-Button-Connect
This connection method is the most widespread among router brands (with the exception of the PIN). Its operation consists of literally pressing a button - physical or virtual - to activate the WPS of the access point for a period of two minutes, so that the device that is trying to connect can immediately recognize where it should "point" to receive the password.
Once the connection has been completed in that time, it will be necessary to repeat the process to add other clients. The PBC is considered as a registrar with physical access, since it is necessary to press a button to activate it.
PIN
This is the mandatory method implemented within this standard, so that all devices certified or compatible with it are capable of connecting through the PIN.
In this regard, there are two ways to connect, one using an “internal” PIN and the other using an “external” PIN. Both are an 8-digit PIN, but the clearest difference is that one is located on the client, and the other on the router or access point.
Internal PIN
The internal PIN is found in the devices that we are going to connect, but it needs to be entered through the web interface of the registrar. So when trying to connect, your access will be verified, and if it matches the previously saved PIN, connection to the network will be allowed.

External PIN
On the other hand, the external PIN is like a second password for the network. If this is entered in the device to connect, it will search for the nearest access point or router with WPS (on a trial and error basis), to deliver the PIN and connect.
It is usually found on the technical information tag on the router, and for this reason, it is considered an external registrar. This is because it does not depend on any internal changes in the router to make the connection.
NFC and USB
Although these are two easy and fast connection methods that are implemented as WPS, they are not officially supported within the official standard, although some manufacturers have introduced them as an added functionality to their equipment.
On the other hand, using an NFC tag or a pendrive with the key is not necessarily related to the base architecture of WPS (register and enroll), since it is the equivalent of providing us with the “normal” name and key to the device, just by other means.
How does access occur?
The operation varies depending on the method, but the structure is more or less like this:
- The device requests network access.
- User activates WPS (PIN, NFC, button) .
- The registrar receives the order to let connect a device that meets certain parameters.
- The registrar provides information about the network to the enrollee, one time only.
- The enrollee receives the access credentials and hands them over to the authenticator.
- The authenticator verifies access, and allows the enrollee to connect with the network password.
In this way, the enrollee receives the network password without the need to deliver it directly to the user who wants to connect to the network. Something especially useful when our passwords are complicated and we do not want to write them with each new device added to the network.
Advantages and disadvantages
The main thing, we avoid sharing the network password to people who visit us, we connect faster than typing it (especially on TVs or consoles), and despite everything, it is an easy method to master.
Even so, there are several details that make this connection method a problem, such as the security of the implementation or the impracticality of having to manually choose the band on which we want to deliver the password.
That is, if we want to connect a 5GHz compatible device and the router activates WPS based on the 2.4GHz WiFi name and password, we will only be able to access the 2.4GHz one and we will have to enter the password manually if we want to connect to the other.
In other routers, it is possible to change the configuration to choose the band in which the WPS will be activated, but we have to go directly to its web interface to make this movement. And so, something that was intended to be a quick and practical method, instantly ceases to be.
Something similar happens with the internal PIN that we must enter in the web interface of the access point or router, since it becomes impractical to constantly enter the configuration to add devices.
Why is it recommended to disable it?
Everything goes on the implementation side and how the protocol was thought. It turns out that for the communication between the client that wishes to connect and the access point or router to be effective, there is a previous exchange of messages between both, before the name and password of the network are assigned.
These messages, among other things, constantly communicate an 8-digit PIN in parts, and at the end of verification, network credentials are sent. More or less so:
connection request
In essence, a message with a key (M1) is sent from the enrollee when registering with the connection request, the registrar sends (in encrypted form) another message confirming the request (M2).
Connection assurance and partial PIN verification
Then, a hash based on the MAC address of both devices is generated and exchanged between them, to continue communication (M3). The registrar asks for confirmation of the first half of the PIN (M4), and to verify it, the enrollee provides the first half of the PIN when registering (M5).
If it is correct, the registrar requests the second part of the PIN when enrolling. The enrollee sends the second part and requests the credentials (M6).
Complete PIN verification and completion of the process
The registrar checks it, if it is correct, it sends the configuration of the access point (M7), and finally, the authentication of the name and the network key (M8) takes place, concluding with the connection of the device.
In case of any problem during the process, the registrar issues a message called EAP-NACK, indicating that one of the data is incorrect or simply does not exist. And this is where security is compromised.
Design that makes controlled access vulnerable
If an attacker tries to make the connection using WPS, the registrar will be sending several EAP-NACKs between M4 and M5, until one of them is correct, confirming the first half with something brute force, since there is not exactly a limit of attempts as such.
This was discovered in parallel by researchers Craig Heffner and Stefan Viehböck, in 2011. If you want to read Stefan Viehböck's paper in full, you can go here.
Following the same example, if the EAP-NACK is received between M6 and M7, we know that the second half of the PIN is wrong, but calculating both parts will be easier.
If at the beginning we had 10 8 PIN possibilities (100,000,000 different), knowing that it is divided into two parts, we only had 10 4 + 10 4 (20,000 possibilities). Although it is an easier number to calculate, we are not done going down yet.
It turns out that the last digit is more of a verification sum or checksum (a function to detect accidental changes and corrupted data) of digits 1 to 7 of the PIN, making things even easier.
And by the way, by not having to guess another digit, the possible PINs go down to 10 4 + 10 3 , which corresponds to only 11,000 attempts to obtain the correct PIN. And without yet adding tools that do this process automatically, such as Reaver.
In this way, it is possible to obtain the password in a couple of minutes, hours or a few days, being much more efficient than a dictionary/brute force attack on WPA/WPA2, which could last —in theory— up to centuries, depending of password difficulty.
Can this vulnerability be mitigated and keep WPS active?
Short answer, no.
This vulnerability affects all devices that allow connection through this method, regardless of the brand.
It should be mentioned – yes – that some manufacturers have introduced temporary WPS locks to prevent this trial and error. But the time it takes to unlock each router or access point is not something that can prevent an attack. Several computers simply go completely to sleep and need to be restarted.
Other attacks, such as Pixie Dust, can speed up this process without the need to constantly attack the access point, thus avoiding the WPS lock and speeding up the process.
In short, disable WPS on your router or access point, because it is a potential danger to the integrity of your network.
How? Although each brand is different, all you have to do is enter the configuration (through the web interface), look for the options related to wireless networks or WiFi, locate the section that mentions the possible names of this standard (those in the first paragraph of this article), and disable it.