What to do after installing Windows 10 - The perfect beginning for your PC
A good way to start the year is to clean our entire PC both outside and inside.Our inseparable friend deserves to be ready and in perfect condition for everything that can bring us.It is time to see what to do after installing Windows 10, the first steps in the configuration and preparation of the system for our applications, games and customization.
Index of contents
Wait, have you really done the best Windows installation?
The first issue we must make is whether we have really done the best Windows installation, which gives us greater versatility and advantages when using our team.In our view, an installation with all guarantees will be one that meets these conditions:
Do not install Windows from an unofficial image: it is not worth looking for ISO on pages other than the official, since Microsoft supplies Windows for free for installation.
We must not install images from virtual or personalized machines: the best thing will be a clean image, without software or integrated controllers, because they may not be compatible with our equipment.
Install the system with an image as current as possible: it will be best to have previously downloaded from the official site the most current version of Windows.In this way we will avoid starting installing an update of features and thus generating garbage from the zero minute.
Create at least two partitions: if we have a large enough unit, we recommend creating a partition for data and games, and another for key programs and the operating system.In this way in case of failure, we will at least save a partition.This can be done once we have installed Windows, from the disc manager.
Update and wait: the key to start well
Once we have installed Windows, we will be presented with a first system configuration assistant.We must know that all these configuration aspects may be modified later from the system configuration section, not being crucial for the normal operation of the system.
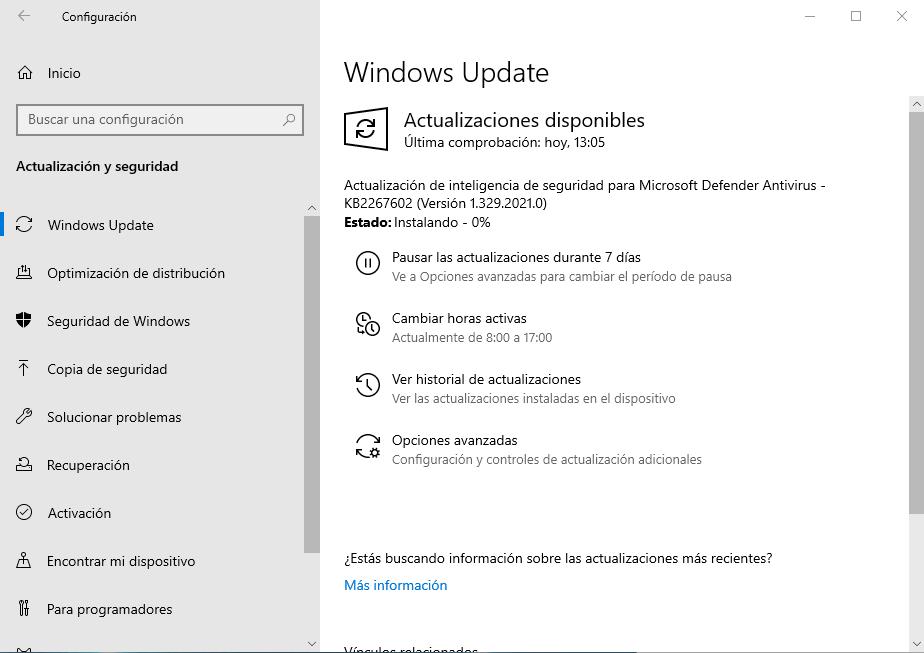
After accessing Windows for the first time, it will be best to go directly to the update section, provided that our network connection is working perfectly.The advantage we have with Windows, is that it has a large number of already pre -installed controllers.In this way, 95% of the driver work will have it, sound, network card, screen or peripherals will work correctly without doing anything.
But there is still a second step in the event that the message of “Update of features to Windows 10, XXXX version” is shown that the image of Windows we have installed was not the most current, so it is our opportunity forCarry out this update considered important or critical of the system.
It will be the best time to do it, since the system does not have applications or personal configuration that can be endangered.This update will invest an important amount of time, so we must wait patiently.
After doing it, we will repeat the procedure of searching for updates, since very possibly new packages associated with this new distribution appear.
Configure network and shared files
We already have our totally updated system, so we can forget for a while to enter this configuration unless some game asks us Microsoft Net Framework or some other package.
We believe that the next necessary step of what to do after installing Windows 10 will be to control the configuration of our network connection, especially if we are in a laptop or intend to share folders in our network.
Configure the network type
La configuración completa la podremos ver en el tutorial anterior, pero centrándonos más en la configuración concreta de la red, la encontraremos en Inicio > Configuración > Red e Internet. Pulsando sobre “Cambiar propiedades de conexión” tendremos dos posibilidades:
Permits
Without leaving this section, we will access “Shared Use options”, where we can choose our preferences according to the type of connection and if we want to share files by the network.
To have the fully armored network but we plan to share folders, we must deactivate all the options in the three sections we show.In case of shared use, we always recommend doing it in private network configuration, marking our domestic Wi-Fi network as a private network instead of public.
Add a user account and pin to have better privacy
Una acción sumamente recomendable para hacer después de instalar Windows 10 será configurar nuestra cuenta de usuario y clave en caso de no haberlo hecho en el asistente tras la instalación. De hecho, es posible que queramos optar por una cuenta local en lugar de usar nuestro correo, usar un pin, Windows Hello o sensor de huella. Todo esto lo podremos hacer desde aquí. La ruta será Inicio > Configuración > Cuentas.
For advanced users who intend to use services such as Windows Hello or the Microsoft store for games and applications, we recommend using a Microsoft account.It will be one that uses our email (Hotmail, Office or Yahoo), thus associating the information of our email, profile, office or OneDrive with Windows.It is the most advantageous for those who have several Windows equipment for giving us a centralized configuration system and more security.
For more basic users or even for equipment to access more people, it is advisable to configure an account for administrator and others for local users with limited permits.We can add as many as we want from the section "Family and other users"
If in your case you prefer to have a local account instead of using the account that you had configured in the start assistant, then you just have to press in "log in with a local account instead."
Energy and performance administrator
The next recommended step to do after installing Windows 10 is to tune our equipment by managing or creating the energy profiles we deem appropriate.
Para acceder a la configuración de energía iremos a la ruta: Inicio > Configuración > Sistema > Inicio/apagado y suspensión. Desde esta pantalla podremos configurar el funcionamiento de la pantalla y la suspensión, pero si queremos acceder al perfil de energía debemos pulsar sobre “Configuración adicional de energía”.
In this way we will access the different profiles, which we can configure in detail accessing to “change the configuration of the plan”, and after this to “change the advanced configuration”.The truth is that Windows should simplify the access and configuration of these profiles, since it continues almost as they presented in Windows XP.
In a desktop PC it will make sense to use a balanced profile for normal use of the device and a maximum performance to play, for example, thus extracting all the power of the equipment.In laptops on the contrary a savings profile will come very well for battery use, being able to limit how much we want the power of the hardware.
Then we will see that through the software of the different manufacturers and brands we can manage the equipment performance in a somewhat simplest way by introducing their own energy profiles.They are not always recommended, but activating it or will not influence the performance of the equipment, especially in gaming laptops.
Create Restoration Points
We have already touched the basic aspects of our operating system without having installed absolutely any external application except those that were included in the event that our team was already coming with pre -installed Windows.
So the best we can do after installing Windows 10 and having the system adjusted to our liking will be to activate the creation of restoration points.In this way, we will be covered from now on to return to this configuration if we install applications that give us stability problems.
Para crear un punto de restauración la forma más directa de localizar esta opción es buscarlo en el menú inicio escribiendo: “punto de restauración”. La otra forma sería: Botón derecho sobre Mi Equipo > Propiedades > Configuración avanzada > Protección del sistema.
First, we will activate the protection of the system and assign a percentage of space for these points.Then we will choose a unit where the system is located and click on creating ...
If we wanted to restore our system in the future using this point, we must click on the system ... If everything goes well, we will reverse wrong configurations that we have performed, returning to a base state from which to leave again.
Installation of main controllers: GPU, chipset, network and sound
At least we have insured a correct configuration and the possibility of returning to it, so it is time to install all the necessary controllers for our hardware.The minimum we must do after installing Windows 10 is to install:
It is possible that the system has not detected all our hardware, and we can see this from the device administrator, which we will access from the beginning.If we see icons with the interrogation sign, it means that Windows has not detected said component.From here we can also look for updates for generic controllers, but not finding specific manufacturers.
Create backup with everything worked perfect
After installing Windows 10 and install all the necessary controllers, it will be highly recommended to perform another restoration point or even a backup.At this time, the system does not yet occupy too much space, so we can keep a backup to turn it when we need to save our system.
Windows dispone de su propio sistema de copias de seguridad al cual accederemos desde: Inicio > Configuración > Actualización y seguridad > Copia de seguridad. En primer lugar, debemos agregar una unidad en donde almacenar las copias, que deberá ser una partición o disco duro distinto al que esté usando el sistema operativo. En Más opciones podremos configurar cuándo, dónde y de dónde queremos hacer la copia de seguridad.
If we opt for a more forceful system in which to create a complete image of the operating system, we have an article in which we collect the best backup programs.
Do you really need an antivirus?
Here those who defend their opinion of necessarily installing an antivirus of payment or free and others who think that Windows Defender is more than enough is to debate.Personally I am from the second group, since Windows Antivirus is always in the top positions in terms of effectiveness and detections.
The key here is not blindly trusting an antivirus, but each user knows what he visits and what he downloads from the Internet.Windows Defender is fully integrated into the system and Microsoft accounts, consuming very few resources and updating at all times.A completely ideal one would be an antimalware software like Malwarebytes.This is free, does not need installation and also has an impressive effectiveness.
Install favorite applications and put them as predetermined
The next step we must do after installing Windows 10 and the basic competent is to add our favorite applications and those we plan to use.Each one will need their concrete, either for their hobbies, to work or if he is a content player.
To these we should add some of each manufacturer, for example, MSI Dragon Center will allow us to manage many aspects of its hardware that would not otherwise be possible.Some of them are already integrated into the system if it is a premanous equipment or a laptop, but if the equipment is bought by parts, these applications will be available in the manufacturer's support section.
Some recommended applications to meet basic needs will be the following:
For most, we already have applications integrated in the system by default, and these will open by default the files we intend to execute.But there is the option to set as default the applications that we have installed.We will do this as follows:
Acquire a license if you want to have 100% customization options
To give the final touch to our Windows 10, we could afford to buy a license and thus register the system associating it to our Microsoft account.This license will still be worthy if we format and install Windows again, provided it is the same distribution (Home, Pro, etc).
The only two advantages that we will have to register Windows will be to unlock system customization options, and eliminate the annoying water mark that appears on the desk.The other Windows functions are completely enabled not having a license.
Recommended extra conclusions and configurations
With these ten points we believe to cover the basic steps to do after installing Windows 10, although obviously there would still be much to do until having a system totally adapted to us.For example, installing applications such as Spotify, Steam, Xsplit, Photoshop or anyone we need for our work and entertainment.
The important thing is always to start from a good base and have the clear steps.Especially when installing applications downloaded from the Internet, always verify that they are reliable sites and that downloads are not fake or contain bloatware.After this, other actions that we recommend would be these:
We hope that it has been useful for those users who have just installed Windows for the first time and had no experience in these tasks.

