Wirelessmon: Know this program to monitor wifi networks
As you can see, it is a very complete program. In relation to the heat map or using a GPS, we must add that at the moment the only compatible USB GPS is the Garmin.
Installation and start-up
The first thing we have to do is download this program completely free of charge from the official website, we currently have the WirelessMon v5.0 version, which is the latest version, and It is compatible with the Windows 10 operating system. The first thing we will see is to accept the license agreement, a very important detail is that this program is paid, but we have up to 30 days of use completely free and without limitations.
Once the agreement is accepted, we select the destination location that we want, although by default it will be in «Program Files», as you can see:
We can also create the corresponding shortcuts to easily access the program from our desktop.
We can also configure a desktop icon:
Once everything has been configured, click on "Install" and the program will be installed completely automatically.
The installation of this program will only take a few seconds:
Finally, click on "Next" and the program will run automatically.
When running this program for the first time, it will tell us that we do not have a software license, we can directly access the purchase of the software from the program itself, also, if we have already purchased the license we can enter the username and password key to legalize the software and be able to use it for more than 30 days.
In case you do not have the license and want to try the software during the 30 days that you indicate, we can do it, click on "Continue" and we will not have to do anything else.
WirelessMon program test for Windows
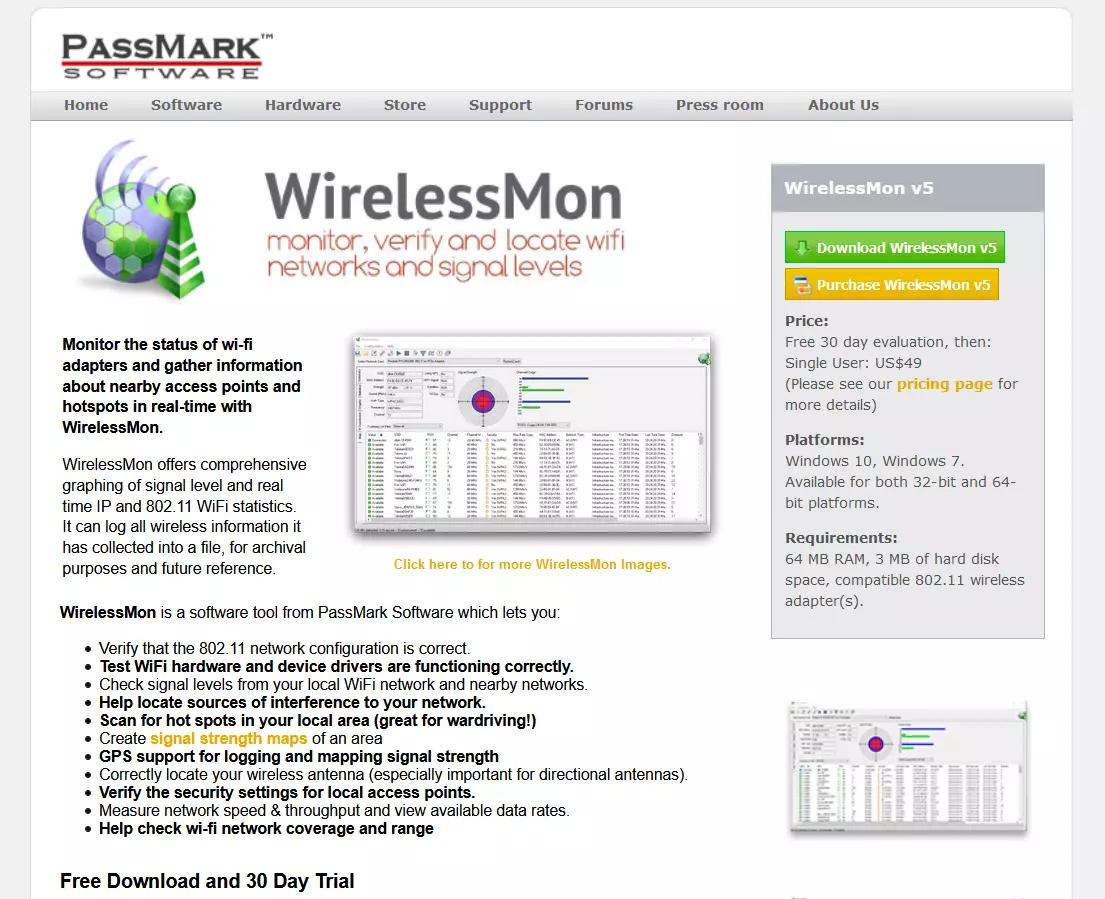
This program has a very simple graphical user interface, at the top is where we have to select the wireless network card of our computer, in case we have more than one. Logically, this program will not work for us if we do not have a WiFi network card on our computer. If we are not connected to any network, the specific information of this particular network will not appear, but we will be able to see the rest of the WiFi networks located at the bottom of the program.
The information of the WiFi networks that we can see are the following:
As you can see, we found a lot of information thanks to this WirelessMon program.
If we select any of the WiFi networks, we will have the option to connect to it through the program itself. We will also be able to see the use of the channel and other important information to optimize our WiFi network to the maximum.
At the top in the “File” section, we have different options:
In the "Configuration" section we can go to the general options, everything related to logging, the map, reset to factory settings, and even select the type of WiFi wireless network signal graph.
Finally, in the "Help" section we can see the help, enter the license key, see the software version, visit the official website and even check if we have a new version.
In the "General Options" section we can see options for the program itself, such as starting it when the operating system starts, calibrating the WiFi card, software transparency and other settings related only to the appearance of the program.
In the "Logging" section we can put the summary of the program log, exporting all the information to a .txt text file, we can also see the log of the connected nodes, save the project automatically and we can even put a SSID filter list.
In the "Map Options" section we will have the possibility of uploading an image to later locate the WiFi networks that we have located around us.
In the "Configuration / Signal Strength Graph" section we can define what type of signal graph it shows us, if it is radar, triangle, vertical bars, etc.
In the event that you choose vertical bars, we will have the same graph as in Windows operating systems in the lower right section.
If we connect to one of the WiFi networks, we will get all the connection details in the upper left, as you can see.
We can also see the statistics of the WiFi connection.
The different channels in very easy to understand graphics, both for the 2.4GHz band and also for the 5GHz band.
In the "IP Connection" section we can see everything related to the connection, it will indicate the IP address, mask, gateway, DHCP server, synchronization speed and much more data.
Finally, if we have loaded a map it will show it here, otherwise it will give us an error because we haven't uploaded a map yet, and we should upload it if we want to take advantage of this functionality.
As you have seen, this WirelessMon program will allow us to see all the WiFi networks around us easily and quickly. We can change the broadcast channel of our WiFi network to have less interference and get the best possible wireless performance.

